
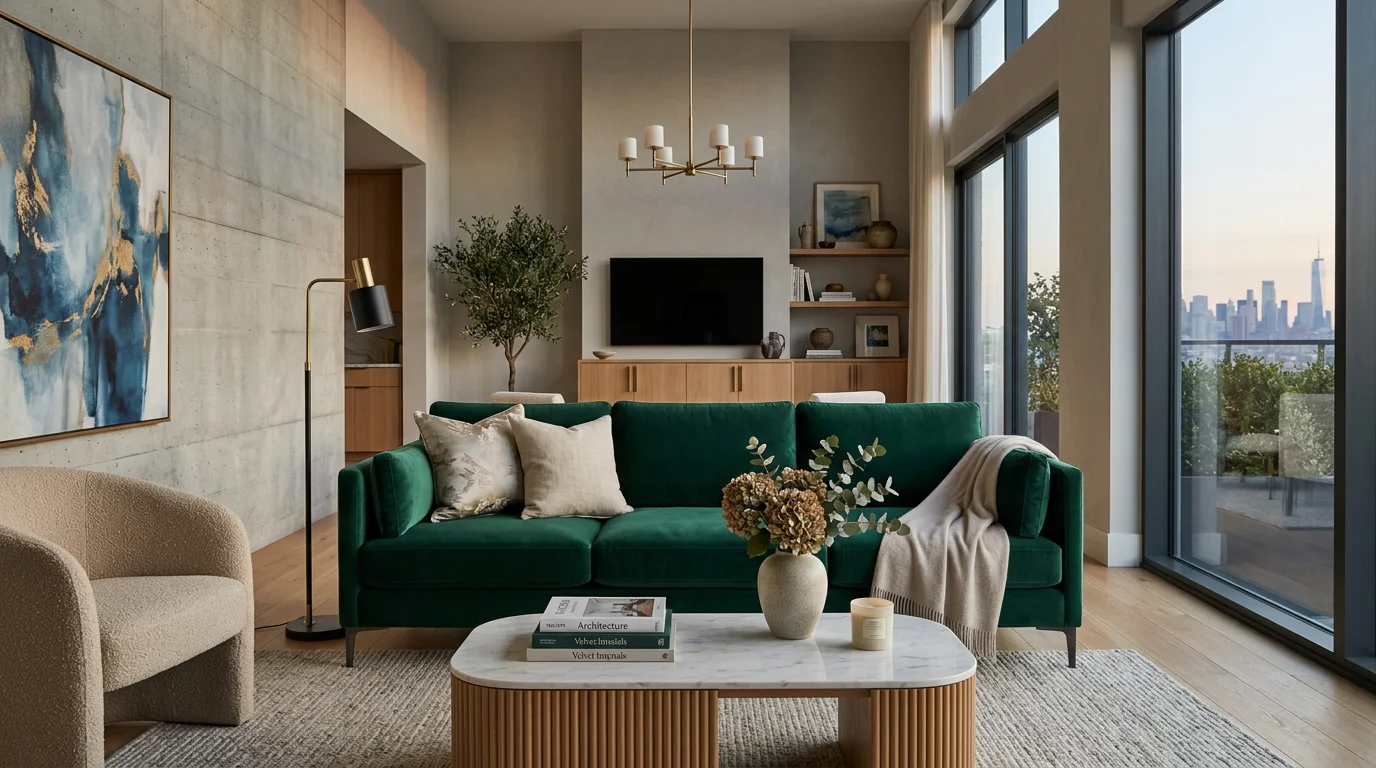
To change furniture in a photo with AI, give DecorViz two images: a photo of the room and a photo of the replacement furniture. DecorViz uses the room as the scene and the product image as the visual reference, then generates a new preview with the product integrated into the space.
This is different from asking a general image generator to “make the room modern.” A general redesign may invent furniture, move architectural details, or change the whole style. DecorViz is designed around the narrower shopping decision: how does this specific product look in this specific room?
Already have both images?
Open the DecorViz furniture swap tool and create the preview now.
Four Ways to Change Furniture in a Photo
The right method depends on whether you want a purchase preview, a creative redesign, precise manual control, or a fully restyled property image.
Dedicated furniture visualizer
Use a room photo and a furniture reference image when you want to evaluate a specific product. DecorViz follows this workflow and is the most direct option for a shopping decision.
General generative editor
Select or mask the old item, then describe a replacement in a text prompt. This works well for exploring ideas, but the AI may invent the design or change nearby details.
Manual photo compositing
Use Photoshop or a similar editor to cut out a product, transform its perspective, build shadows, and match color. It offers the most control but requires time and editing skill.
Virtual staging or full-room redesign
Use this when the goal is to furnish an empty property photo or reinterpret the whole room. It is less suitable when exact preservation of the current room and product identity matters.
Quick method selector
- Buying a real product: use a reference-image visualizer such as DecorViz.
- Exploring a style: use a text-prompt generative editor or room redesign tool.
- Producing a controlled marketing image: use manual compositing or professional retouching.
- Staging an empty listing: use a virtual staging workflow.
Why the Product Image Matters
Text such as “add a beige sofa” describes a category. It does not capture the arm shape, cushion structure, leg finish, fabric texture, or exact shade of the item in your shopping cart. A product image gives DecorViz a concrete reference.
Compare the item, not an approximation
Use the product image from the retailer listing so the preview reflects the furniture you may actually order.
Keep the room relevant
Your walls, floor, windows, light, rug, and nearby furniture provide the context missing from a catalog image.
Explore alternatives consistently
Use the same room photo with several product images to compare colors, styles, and materials on equal ground.
How to Change Furniture in a Photo With DecorViz
Step 1: Choose a clear furnished room photo
For a replacement, the existing furniture should be visible. Show the sofa, chair, table, or other item you want to change, plus enough floor, walls, and surrounding decor to establish perspective. Daylight or balanced indoor light works better than a dark or strongly backlit image. Hold the camera level and include the floor beneath the item.
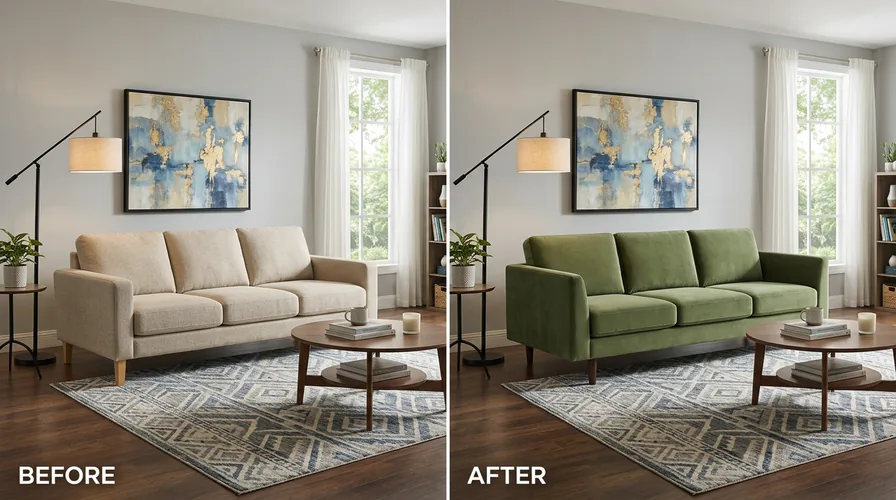
A furnished before-and-after keeps the room recognizable while showing the replacement product in the same position.
Step 2: Save the replacement product image
Choose the exact variant you are considering. The best reference shows one product clearly, with the full outline visible. An angled view often works better than a straight-on image when the room is photographed from a corner.
- Use the correct color and finish.
- Avoid images where another product blocks part of the item.
- Avoid text, price badges, and decorative overlays across the furniture.
- Do not crop legs, arms, or the outer edges.
Step 3: Upload both images
Open DecorViz Furniture Swap. Add the room photo first, then the product image. DecorViz works with furniture from almost any retailer, so you are not limited to one catalog or brand.
Step 4: Generate the replacement
DecorViz analyzes the room and creates a new image with the product placed into the scene. The system adjusts lighting, perspective, depth, and shadows so the replacement feels connected to the room rather than pasted on top.
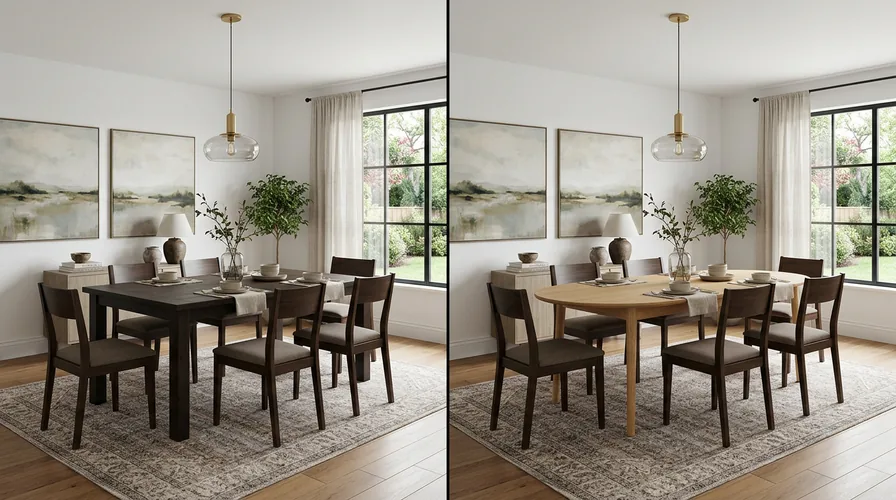
Changing only the dining table makes it easier to compare shape, finish, and visual weight while keeping the room context consistent.
Step 5: Compare, retry, and measure
Compare the result with the original photo. If the product looks visually plausible, try another option using the same room image. If the integration looks distorted or nearby details changed too much, use a clearer input or generate another version. Before buying, confirm the retailer’s dimensions against the physical room.
Can ChatGPT or Photoshop Change Furniture in a Photo?
Yes. Conversational AI image editors such as ChatGPT or Gemini can use prompts, an uploaded room photo, and sometimes reference images to change furniture. Photoshop can replace a selected area with Generative Fill or give an experienced editor direct control through manual compositing.
For a prompt-based edit, select or describe the old item as precisely as possible. Name the replacement, material, color, viewing angle, and the parts of the room that should remain unchanged. For example: Replace the armchair with a low olive-green velvet lounge chair viewed at the same angle. Keep the walls, floor, window, rug, lighting, and all other furniture unchanged.
These tools are useful for concept exploration, but results vary in product fidelity and preservation of nearby details. Photoshop offers more manual control but takes more skill and time. When the shopping decision depends on a particular product image, DecorViz provides the focused room-photo plus product-image workflow.
How to Judge the DecorViz Result
A beautiful image is not automatically a useful preview. Review the result in two separate passes.
Judge the render first, then judge the product
If floor contact, perspective, lighting, or nearby details look wrong, retry the generation before deciding whether the furniture belongs in the room.
First, check the generated image
- Does the furniture make believable contact with the floor or wall?
- Do its angle and perspective agree with the room?
- Do the lighting and shadows feel consistent?
- Did important room details remain recognizable?
Then, judge the furniture decision
- Does the color work with the floor, walls, and textiles?
- Does the shape complement or fight the surrounding furniture?
- Does the material feel too formal, too casual, too heavy, or balanced?
- Would another product or finish create a calmer result?
If the first check fails, retry the generation. Do not reject the product because of a visibly poor render.
Common Problems and Practical Retries
The product angle feels wrong
Choose a retailer image photographed from an angle closer to the room camera.
The furniture looks flat or pasted in
Use a room photo with clearer floor contact and more balanced light, then regenerate.
Thin details become distorted
Spindle legs, wire frames, glass edges, and intricate patterns are difficult. Try a sharper product image with less background clutter.
Nearby objects change
Generative previews can alter small details around the replacement area. Compare against the original and retry if those changes distract from the decision.
A retry is part of the process
Product and room images vary widely. A second product angle or clearer room photo can produce a more believable result than repeatedly using an unsuitable input.
What Furniture Can You Replace in a Photo?
DecorViz supports many furniture and decor categories across homes, offices, hospitality spaces, and outdoor areas.
Seating
Sofas, sectionals, accent chairs, dining chairs, office chairs, benches, and outdoor seating.
Tables and storage
Coffee tables, dining tables, desks, nightstands, dressers, bookshelves, sideboards, and TV stands.
Soft furnishings
Rugs, curtains, bedding, cushions, and other products whose color or pattern changes the room.
Lighting and decor
Floor lamps, pendant lights, mirrors, wall art, planters, and related room accents.

The same room-and-product workflow can support residential and commercial furniture decisions.
For product-specific guidance, use the sofa visualizer, rug visualizer, bed visualizer, dining table visualizer, or explore all furniture visualization options.
A Visual Preview Is Not a Physical Fit Guarantee
DecorViz is designed to show how a product may look in your room. It helps with visual compatibility: color, material, shape, style, and believable proportion. It does not measure the room from one image or certify that an item will clear a doorway.
Before ordering, check the product width, depth, and height. Measure the intended position, delivery path, doors, stairs, and elevators. Use the DecorViz preview and physical measurements together, because they answer different parts of the purchase decision.
Frequently Asked Questions
Can I replace furniture in a photo with DecorViz?
Yes. Upload your room photo and an image of the replacement furniture. DecorViz creates a realistic preview of that product in the room.
Can ChatGPT or Photoshop change furniture in a photo?
Yes. General AI editors can modify a selected area using prompts and reference images, while Photoshop supports generative editing and manual compositing. A dedicated product-image workflow is useful when you want to evaluate a specific item in your room.
Do I need an empty room photo?
No. For furniture replacement, use a furnished room photo that clearly shows the existing item and the surrounding floor, walls, and decor. An empty room is more relevant when adding furniture to a blank space. For that workflow, see the free AI furniture placement guide.
Can I use furniture from any store?
You can upload a clear product image from almost any retailer, brand, marketplace, or independent furniture store.
Will everything else in the photo remain identical?
DecorViz focuses on the furniture change, but generative results can occasionally alter nearby details. Compare the output with the original and retry when a change reduces credibility.
Does the result prove the furniture will fit?
No. The preview supports a visual decision. Check the product dimensions and measure the room before purchasing.
Do I need Photoshop or 3D design skills?
No. DecorViz handles the visual integration from the two images. No Photoshop, CAD, AR scan, or 3D room model is required.
Replace the guess with a room-specific preview
Upload the room you know and the furniture product you are considering.
If you want to add furniture to a room rather than replace an existing item, read the free AI furniture placement guide.