Overview
The DecorViz: Furniture Visualizer app adds a "See in Your Room" button to your Shopify product pages. A shopper selects it, uploads a photo of their own room, and gets a realistic preview of that product in their space before deciding.
It works from the product photo already published on the page. There are no 3D models to commission, no product feed to map, and no per-product setup: once the app embed is on, every suitable product page is covered, including products you add later.
The whole setup lives inside your Shopify admin. You never open a theme file.
WooCommerce, Wix, Squarespace, and custom-coded stores install Storefront with one script from the DecorViz web dashboard instead. That is covered in the Storefront setup guide.
The app embed is switched on from the theme editor and can be switched back off the same way.
DecorViz detects suitable products on its own. You only touch the Products page to hide the button on specific items.
Room photos are used to generate the preview and are not exposed to you in the app or in analytics.
Before You Start
There is very little to prepare:
- A Shopify store you can administer. You need permission to install apps and to edit the theme.
- A Shopify theme you can customize. App embeds work with both vintage and Online Store 2.0 themes, so there is no theme upgrade to do first.
- Product pages with a clear product photo. Storefront reads the image straight from the page, so a clean, well-lit product shot is the only input it needs.
The app uses your Shopify shop owner email to create or link a DecorViz account for you after install. If you already subscribe to the Storefront plan on decorviz.ai, install with that same email and the app runs on the plan you already pay for.
Installation
Three steps, start to finish. There is no key to copy: the app connects your store by itself, and the setup checklist on its Dashboard ticks off each step as it happens.
Step 1: Install the App
Install from the Shopify App Store
Open the DecorViz: Furniture Visualizer listing and install it on your store. The app asks for read access to products only, so it can build the category list and let you exclude specific items. It never writes to your catalog and never touches orders or customers.
New installs begin on the Free plan with 5 free previews and no Shopify charge. That is enough to put the button live and test it against your own products before choosing a plan.
Step 2: Switch On the App Embed
Open the theme editor from the Dashboard
Open DecorViz from Apps in your Shopify admin. The Dashboard opens with a Get set up checklist. Under Turn on DecorViz in your theme, select Open theme editor. Your theme editor opens on App embeds: switch on DecorViz Storefront and click Save.
Switch on DecorViz Storefront under App embeds and save. There is nothing to copy. Open theme editor
This is what you are switching on in the theme editor:
Shows a Preview button on suitable product pages. Shoppers upload a photo of their space and see your furniture there.
The setting belongs to the theme you switched it on in. If you publish a different theme later, the Dashboard shows a warning that the Preview button is off, with a link that opens the new theme's editor. Switch DecorViz Storefront on there and save. Your button settings and product exclusions are unaffected.
Step 3: Test a Product Page
Generate your first preview
Open a product page on your live store URL, not the theme editor and not a draft preview. Confirm the Preview button appears where you expect, then upload a photo of a room and generate a preview end to end.
This is what you are looking for. The Preview button sits in your theme's own button row, beside Add to Cart:
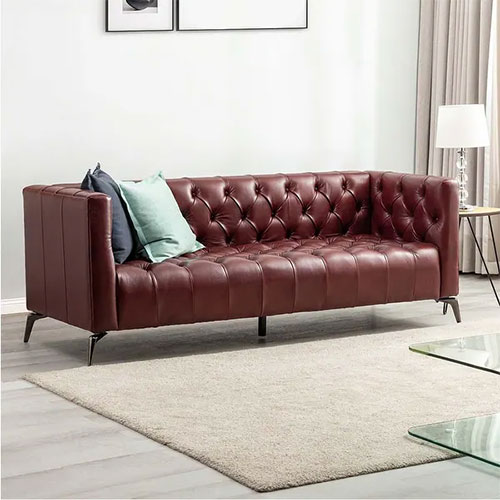
Premium velvet upholstery with solid wood frame. Available in 4 colors. Free delivery.
A demo of the shopper view. Your button text, color, and position come from the app's Settings page.
Worth checking a few different templates while you are there: a simple item, a variant-heavy item, anything custom-built, and at least one page on mobile. Then open a non-product page such as your homepage and confirm the button does not appear.
The Dashboard ticks off each step as it happens: the embed switched on in your theme, a shopper seeing the button, and a first preview. Once all three are done the checklist goes away. Everything below is optional tuning.
Your Dashboard
After setup, the Dashboard is where you see what the Preview button is doing for your store:
- Your plan. The current plan, the generations left (each preview uses one), and how many products show the button.
- This billing period. When it started, when it renews, and how many days are left. Shown for paid plans, whether billed through Shopify or on decorviz.ai.
- Previews per day. A bar for each of the last 30 days.
- Most previewed products. Your products with their names and photos, for the last 7 days, the last 30 days, this month, last month, or all time.
- Previews by category. Which product types shoppers picture at home most, for the same date range.
- Preview button. Whether DecorViz Storefront is on in your current theme, with links to the theme editor, Settings, and Products.
The Dashboard shows how many previews were made and on which products. The room photos shoppers upload are never shown to you.
Choosing Which Products Show It
You do not switch products on one by one. After you install the app, DecorViz reads your catalogue, sorts each product into a category, and shows the Preview button on every product it recognises. It looks at the product category you set in Shopify first, which works in any language, and falls back to the product's title and description.
Everything about which products show the button lives on one page: Products in the app. Your products are listed under their categories, and you have three controls:
- Categories. Untick a category to hide the button on all its products. This is the broad control.
- Individual products. Untick a single product to hide the button on it, or tick one inside an unticked category to keep it.
- The category itself. If DecorViz put a product in the wrong category, or could not recognise it, choose the right one from its Category list.
DecorViz sorts your products into categories and shows the Preview button on them. Untick a category to hide the button on all its products, then tick any product you still want it on. If a category is wrong, change it.
Changes reach shoppers within a few minutes.
Categories
Each category has its own row on the Products page, with the number of products in it and a tick in the Preview button column. Everything starts ticked. Untick a category to take the button off all its products at once; tick it again to bring it back. A category shows its first products, with a Show all link to page through the rest.
Individual products
Each product has its own tick too. Untick one to hide the button on it while the rest of its category keeps it. Inside an unticked category, tick a product to show the button on that one only. Unticking a whole category clears these single-product choices inside it, so the category tick always gives you a clean start.
Fixing a category
Use the Category list on a product's row to move it. The category also decides how the product is placed in the shopper's room photo, so a lamp filed as a table is worth correcting. Products under Not recognised show no button; choose a category for any that should have one. Gift cards, accessories and spare parts usually belong there.
DecorViz reads your products in the background after you install the app. On a large store the Products page shows how far it has got and fills in by itself, and the reading carries on even if you close the app. Shoppers already see the Preview button on suitable products in the meantime. Products you add or edit later are picked up automatically.
Leaving detection to run and unticking the few categories or items that do not suit it is usually faster than trying to predict the list up front. New products are covered automatically either way.
Billing & Previews
A preview is counted when a shopper generates one. Browsing the product page and opening the widget cost nothing.
- Free: 5 free previews, no Shopify charge and no card.
- Storefront 250: $119 per month for 250 previews. First month $99.
- Storefront 500: $199 per month for 500 previews. First month $169.
Paid plans renew monthly through Shopify and can be cancelled from your Shopify admin. Upgrades start immediately and add a full new allowance on top of whatever you have left; downgrades take effect at the end of the current billing period. The first-month price applies once, to your first subscription, not to later plan changes.
If the monthly allowance is used up, the Preview button stays visible, but a shopper who tries to generate a preview sees a temporary-unavailability message instead of a result. They are never told the store has run out. The app warns you when three previews remain and again at zero, so watch for those banners.
Install the app with the same email you registered with and it runs on your existing Storefront plan. The app shows a "Billed on decorviz.ai" note instead of asking you to subscribe through Shopify, and previews come out of the allowance you already pay for. Manage that plan by signing in at decorviz.ai.
Troubleshooting
Button not appearing anywhere
- Check the app's Dashboard or the Status section in Settings. Both show whether DecorViz Storefront is on in your published theme, and link to the theme editor if it is not
- After switching it on in the theme editor, make sure you clicked Save
- Make sure you are viewing your live store URL, not the theme editor or a draft preview
- Check that "Show the Preview button on my store" is on in the app's Settings
- Clear your browser cache and reload
Button not appearing on one specific product
- On the app's Products page, check that both the product and its category are ticked
- If the product is listed under Not recognised, choose its category from the Category list
- If the theme is heavily customized, set a CSS selector in Settings to target the exact element
Button appears twice
- This means the runtime is loading twice. If you previously pasted the DecorViz script into your theme by hand, before installing the app, remove that snippet from your theme and keep only the app embed
Button appears but generation does not work
- Check your remaining previews on the app's Billing page. Once the allowance is used up the button still shows, but shoppers get a temporary-unavailability message rather than a preview
- Confirm your subscription is active. A cancelled or lapsed plan turns generation off while leaving your settings intact
You changed your store's domain
- There is nothing to update. The Preview button follows your store's domains, including a custom domain you connect later
"Shop owner email is missing" banner
- Shopify did not return an owner email for the store, which DecorViz needs to create or link your account. Add one in your Shopify admin and reopen the app, or email [email protected] with your shop domain
Wrong or missing product image in the preview
- The runtime pulls the main product image directly from the page. Confirm that image loads normally for shoppers rather than being hidden behind a click or a lazy-loaded gallery
- If your theme uses an unusual gallery structure, contact support so we can review the markup
Contact our support team at [email protected], or use the Support page inside the app.
Frequently Asked Questions
Do I have to set up each product separately?
No. The app sorts your products into categories and shows the Preview button automatically, including products you add after installing. You only open the Products page to hide the button on a category or a single product, or to correct a product's category.
Do my shoppers need a DecorViz account?
No. Shoppers use the Preview button straight from your product page. There is no signup, no download, and no payment to DecorViz.
Can I see the room photos shoppers upload?
No. Room photos are used only to generate the preview. They are not exposed to you through the app or through product analytics.
What happens when I change themes?
App embeds are stored per theme, so a newly published theme usually starts with DecorViz Storefront switched off. The app's Dashboard warns you and links to the new theme's editor: switch it on there and save. Your button settings and product exclusions carry over untouched.
Will it slow down my product pages?
The runtime loads asynchronously, so it does not block your product page from rendering.
What data does the app read from my store?
Product data only, and read-only. DecorViz uses it to sort your products into categories on the Products page. The app does not write to your products and does not request access to orders or customers.
I already pay for Storefront on decorviz.ai. Do I pay again?
No. Install with the same email you registered with on DecorViz and the app runs on your existing plan, showing a "Billed on decorviz.ai" note rather than a Shopify subscription prompt.
What happens if I uninstall?
The Preview button stops appearing and any Shopify subscription ends with the uninstall. Shopify sends us a shop redaction request afterwards and we remove the store's data on the timelines Shopify sets. See the privacy policy for the detail.
Ready to Get Started?
Install the app, switch on the embed, and let DecorViz cover your product pages.