
Before you start
DecorViz Storefront detects supported product pages, reads the product image, and adds a room-preview button. Shoppers open the widget, upload a room photo, and generate a preview without creating a DecorViz account.
- A live Squarespace store with clear product photos and a plan that supports JavaScript Code Injection.
- A DecorViz account with access to Storefront and available preview credits. Check your status in the Storefront dashboard.
- Access to your Squarespace site's Code Injection panel, or help from the person who manages your website.
Code Injection is available on Squarespace Core, Plus, and Advanced plans, and eligible legacy Business, Commerce Basic, and Commerce Advanced plans. Basic and legacy Personal plans do not include this installation method. Check your plan before starting. See Squarespace's custom-code requirements.
First, create your storefront in DecorViz. Then copy its snippet into Squarespace. After that, test the button on a live product page. The examples below show what to look for at each step.
1. Select Squarespace in DecorViz
Create your storefront
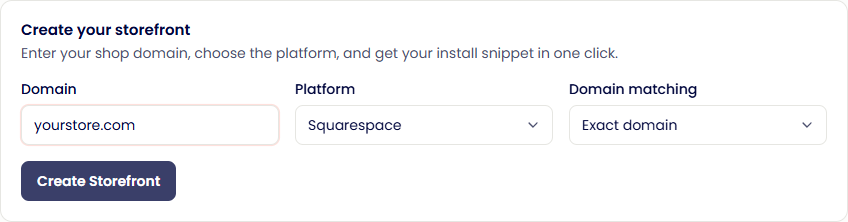
Sign in and open the DecorViz Storefront dashboard. On your first visit, you will see Create your storefront.
Enter your store domain
Enter only the website domain, for example yourstore.com. Leave out https:// and product-page paths such as /shop/blue-rug/.
Select Squarespace in Platform
In Create your storefront, open the Platform dropdown and choose Squarespace. Enter your public store domain, keep Exact domain if you use one hostname, then click Create Storefront.
Click Create Storefront
Your storefront is now connected to that domain. If you already have a storefront, open Settings to review these values instead.
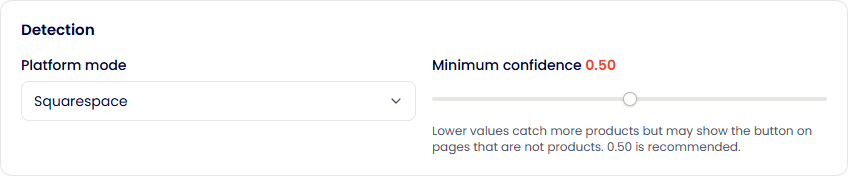
Already created your storefront?
Open Storefront → Settings → Detection. Set Platform mode to Squarespace, then click Save changes. You do not need to create another storefront or replace your install snippet.
If your shop lives at shop.yourstore.com, enter that hostname. Review the domain-matching settings if you also serve product pages on other subdomains.
Enable Storefront and copy your snippet
Open the Settings page. Make sure Enable storefront is switched on, then click Save changes. Scroll down to the Install snippet card and click Copy.
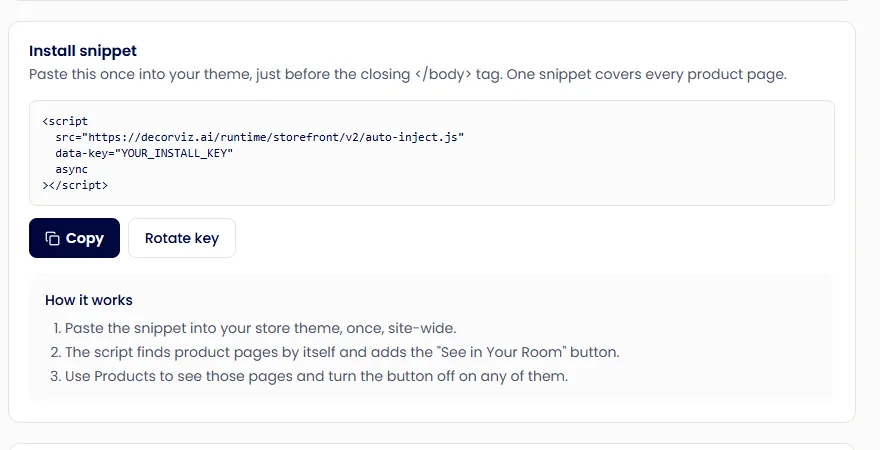
Copy from your dashboard, not from this guide. Your dashboard includes the correct install key automatically. The example below only shows the format.
<script
  src="https://decorviz.ai/runtime/storefront/v2/auto-inject.js"
  data-key="YOUR_INSTALL_KEY"
  async
></script>You only need Copy. Selecting Rotate key replaces the key and stops the old snippet from working.
2. Install with Squarespace Code Injection
Use the site-wide Footer field so your snippet loads on product pages throughout your store. You do not need to edit each product or install a Squarespace extension.
Open the Code Injection panel
Find Custom Code
In your Squarespace website dashboard, open Pages and scroll to Custom Code. Choose Code Injection. On version 7.0, look under Website Tools instead.
Menu labels can vary by site version. Squarespace documents the current location in its Pages panel guide.
Paste your snippet into Footer
Find the site-wide Footer field
In Code Injection, locate Footer. Use this global field, rather than an individual page's Header Code Injection field or a Code block in a product description.
Paste and save
Add the complete snippet copied from DecorViz, including <script and </script>. Preserve any existing footer code and place DecorViz on a new line. Click Save.
Pages → Custom Code → Code Injection
Code Injection
<script
  src="https://decorviz.ai/runtime/storefront/v2/auto-inject.js"
  data-key="YOUR_INSTALL_KEY"
  async
></script>
Paste your own dashboard snippet here. Keep existing footer scripts.
Illustration of the fields to use. The Squarespace layout may differ.
Check the published website
Open a public product page in a private browser window while logged out of Squarespace. Code can behave differently inside the editor, so use the live website to check the shopper experience.
Keep one copy of the DecorViz snippet in Footer. You do not need a copy on every product. Checkout does not support injected code; the room-preview button belongs on the product page.
For the platform's installation instructions, see Squarespace's Code Injection guide.
3. Customize your room-preview button
Open the Appearance page in the DecorViz dashboard. Choose your button text, style, corners, color, and position, then click Save changes. Use wording such as “See in Your Room” so shoppers know what to expect.
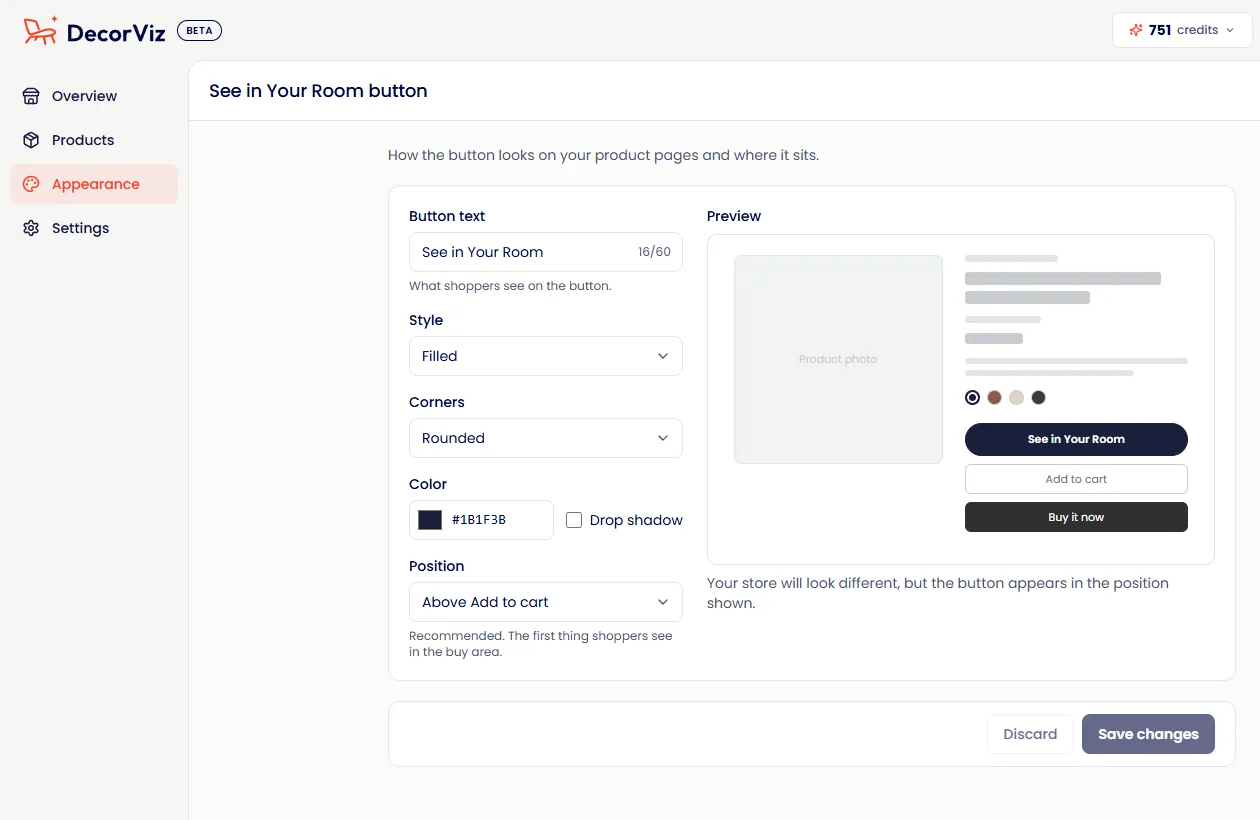
For a first test: start with Above Add to cart. If your theme makes that position awkward, try Below the product image. Save and refresh your product page to see the change.
On the Products page, check the category switches and the product list. If an eligible product should not offer room previews, switch its button off there. Start with the default detection settings and test before adjusting Minimum confidence on the Settings page.
On the Products page, make sure the switch for the rugs category is on. Products in a category that is switched off do not show the button.
If a product comes in different stains, colors, or fabrics, click Add options under its photo on the Products page and add a photo for each one. Shoppers switch between them in the preview window. See Product options in the Storefront guide.
Custom Squarespace layouts and galleries can affect button placement. Check your published product pages on desktop and mobile.
4. Test a live product page
Open the published product URL shoppers visit, rather than a Squarespace editor or preview link. Check each product range you intend to offer for room previews, including products with different photos or options.
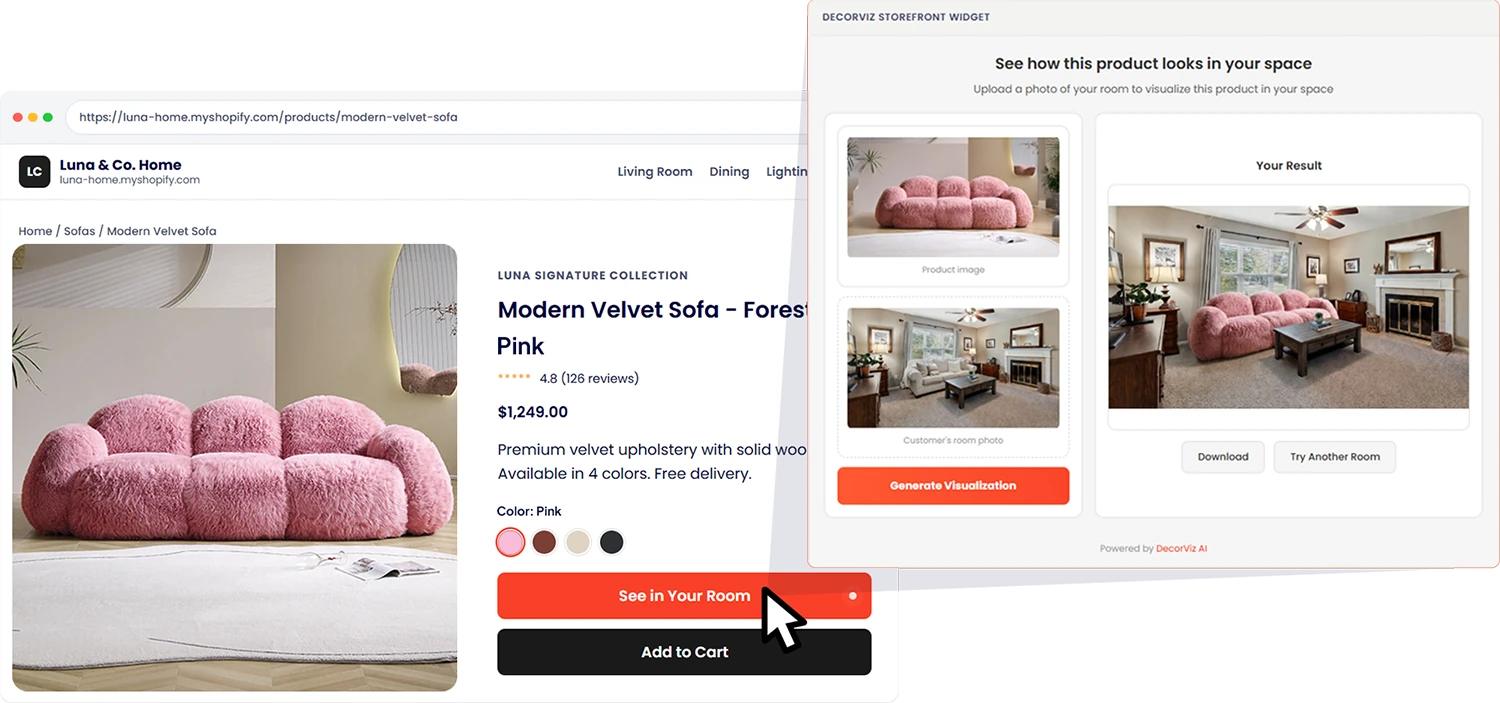
- Open a live furniture product page in a private browser window, using the hostname saved in DecorViz.
- Confirm that the preview button appears in the position you selected. Check both desktop and mobile.
- Open the widget and check the product photo. If you configured photo options in DecorViz, check each option in the preview window. Changing a Squarespace variant does not automatically create a matching DecorViz photo option.
- Upload a room photo and generate a preview. This uses a preview credit.
- Check that the gallery, variation selection, and Add to Cart button still work.
- Open the Products page in DecorViz and confirm the visited page is listed. Check its category and whether it belongs on the wall, floor, or a surface. Also visit a collection page and the homepage, where the product-preview button should not appear.
The button appears on the product page, the widget shows the correct product image, and a room preview generates successfully. Repeat the check on mobile before sharing it with shoppers.
Troubleshooting
I cannot find Code Injection
Check your Squarespace subscription and site permissions. Code Injection requires an eligible plan. Look under Pages → Custom Code, or Website Tools on version 7.0. Ask the site owner for help if you cannot access those settings.
The button does not appear
- Open the published product page in a private window, outside the Squarespace editor.
- Confirm the full snippet is saved in the site-wide Footer field and contains the install key copied from your dashboard.
- In DecorViz Settings, choose Squarespace, switch Enable storefront on, and click Save changes.
- Check that the public hostname matches your saved Storefront domain.
- On Products, check the product and category switches. Review unrecognized products there, or send us the live product URL for help.
The photo or product category is wrong
Open Products in DecorViz. Review the product's category and use the photo controls to choose a replacement image or add photo options for different finishes. Use the product-options walkthrough for the dashboard steps. Contact us if the page is still detected incorrectly.
The button is in the wrong position
Review Appearance, choose a position, and save. Check both desktop and mobile after refreshing the product page. If a customized Squarespace layout still causes a problem, contact us with the live URL, selected position, and a screenshot.
The widget opens, but a preview fails
Check your Storefront access and available preview credits. Confirm that the product photo loads and try a clear room photo. If it still fails, send the product URL and the displayed error message to support.
I added the snippet in more than one place
Keep one copy in the site-wide Footer field. Remove additional copies from page settings or Code blocks, preserve other scripts, and save. Reopen a published product page in a private window.
Common questions
Do I need to add code to every product?
No. Add your snippet once in site-wide Footer Code Injection. DecorViz detects supported product pages. Review products, categories, photos, and visibility in the Products page.
Do I need a Squarespace extension or 3D models?
No. Installation uses the snippet from your DecorViz dashboard. Previews use your product photos and the room photo supplied by the shopper.
Should I choose Squarespace or Auto detect?
Choose Squarespace for the platform-specific product reader. Auto detect can also read product information on Squarespace. If you change the setting, save and check your published product pages.
Can shoppers preview different finishes?
Yes. Add a photo for each finish through Add options on the DecorViz Products page. Shoppers select those photos in the preview window. Squarespace's own variant picker and DecorViz photo options are configured separately.
Will it appear in the Squarespace editor or at checkout?
Check the live product page while logged out, since the editor can handle custom scripts differently. Checkout does not support Code Injection. Shoppers use the preview on the product page before buying.
How do I remove Storefront?
Remove only the DecorViz script from Footer Code Injection and save. Keep any other scripts. Refresh the published site to confirm the button is gone.
What happens if I rotate my install key?
The old snippet stops working. Copy the new snippet from DecorViz Settings, replace the old one in Squarespace, save, and test a published product page.
For more dashboard settings, see the general Storefront setup guide. For other platforms, use the WooCommerce guide or Shopify app guide.
Connect your Squarespace store
Get your install snippet and give shoppers a room-preview option on your product pages.